How to Make Tiny Wooden Houses Using Scrap Wood

This post may contain affiliate links. Please read our disclosure policy for more information.

Square feature photo of finished tiny wooden houses painted and on on a wood shelf. There are three shelves shown. The houses are painted dusty gues, greens, white and ivory. Each with dark gray roofs sprinkled with white glitter for a snowy effect. Beside some houses is a cluster of bottle brush trees.

These tiny wooden houses are adorable and perfect for a small shelf or tiered tray!

I made a small village of snowy scrap-wood houses to fill a thrifted wall shelf I’d been saving for the right project. The finished piece became a cozy winter display and worked beautifully as seasonal decor in my antique booth.

Photo of a full wood shelf that has 17 colorful, snowy roofed miniature houses. In between some are clusters of snowy looking miniature bottle brush trees to complete the scene.

Supplies

How To Make Tiny Wooden Houses – 4 Easy Steps
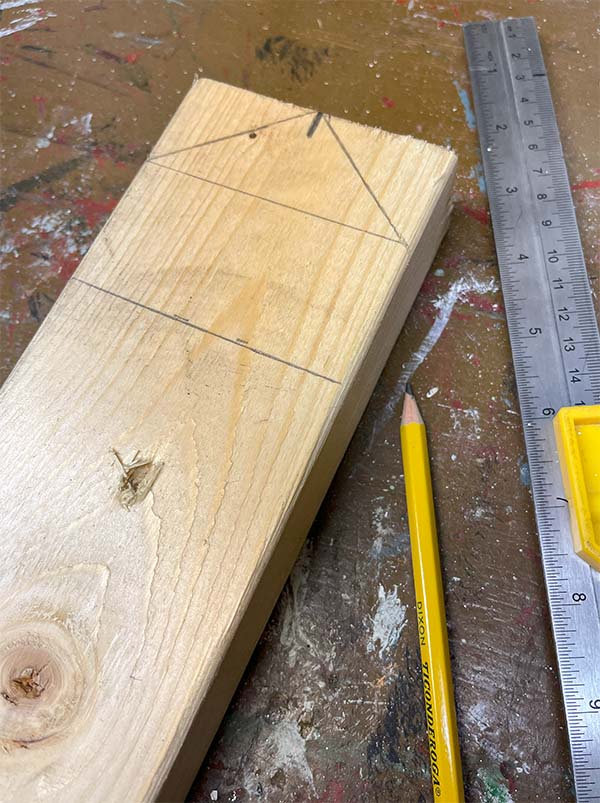
STEP 1:

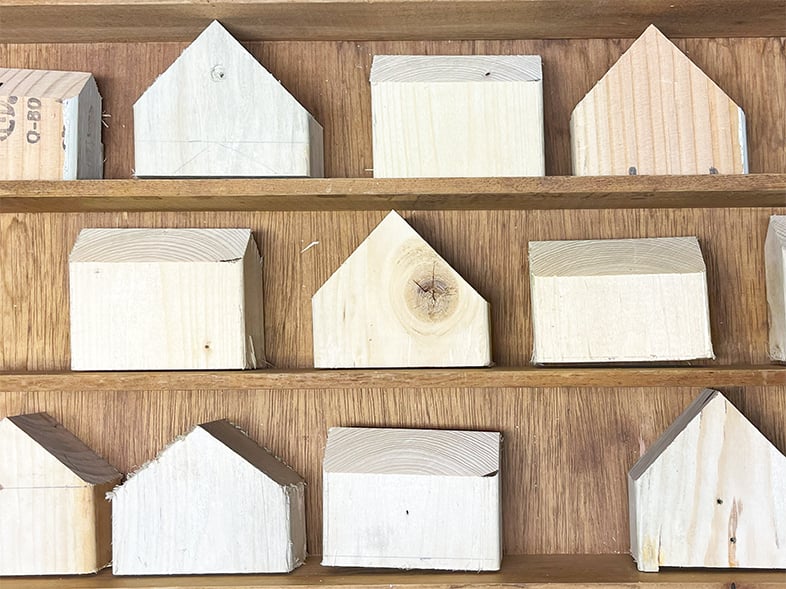
Trace out your houses. Start by finding and marking the center of the 2×4. Draw a line below to mark the bottom of the roof. Draw two lines to the center point to make a triangle. Measure from the center 3″ down from the top and draw a line to mark the bottom of the house. Cut with a miter saw, then use a sanding block to smooth any rough edges.

Safety note: It’s best to work from the long end of your 2×4 and cut each house as you go using a miter saw. Keeping the board long gives you better control and keeps your hands safely away from the blade.
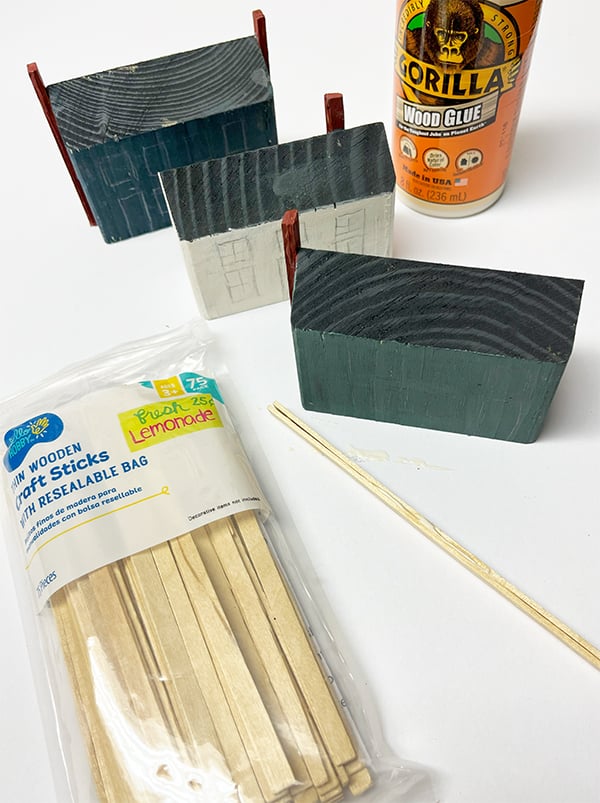
Marking a 2 x 4 by finding the center and marking there. Make a line for the bottom of the roof and angled lines to the center point. Last, measure down three inches from the top and mark a line for the bottom of your house. Now you're ready to cut with a circular saw.
photo of raw wood 2x4s cut into house shapes and sitting of a wooden shelf ready for sanding and painting.

STEP 2:

Cut wooden chimneys and attach them to each house using wood glue. For the taller houses, I used two wooden craft sticks glued together and a square wood dowel for the others.

Tip: You can also use a nail for a chimney.

Photo of wooden craft sticks being glued together with wood glue. These will be used to make the chimneys for some of the tiny wooden houses.

For angled cuts, use the roof line of your house as a guide and mark with a pencil.

Using the roof line of a wooden house to mark the angle with a pencil to make a chimney. This is an easy way to match the angle of the roof without measuring.

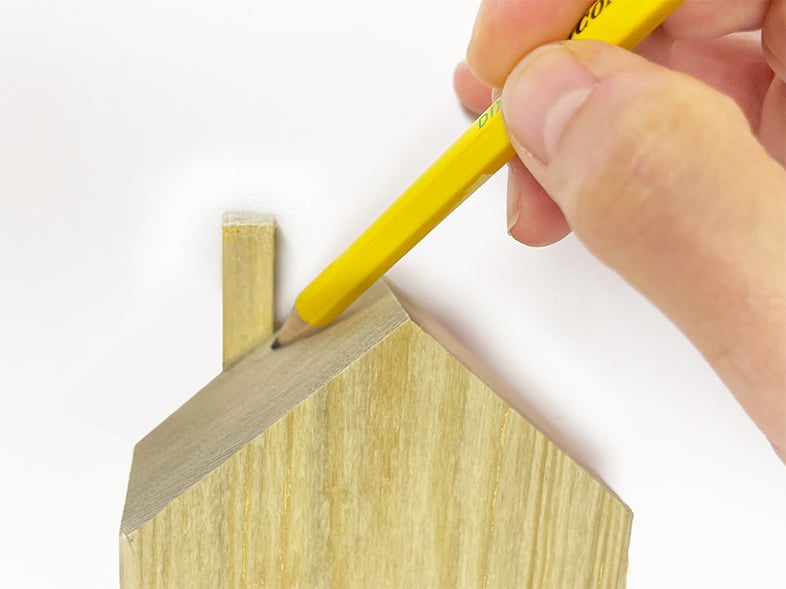
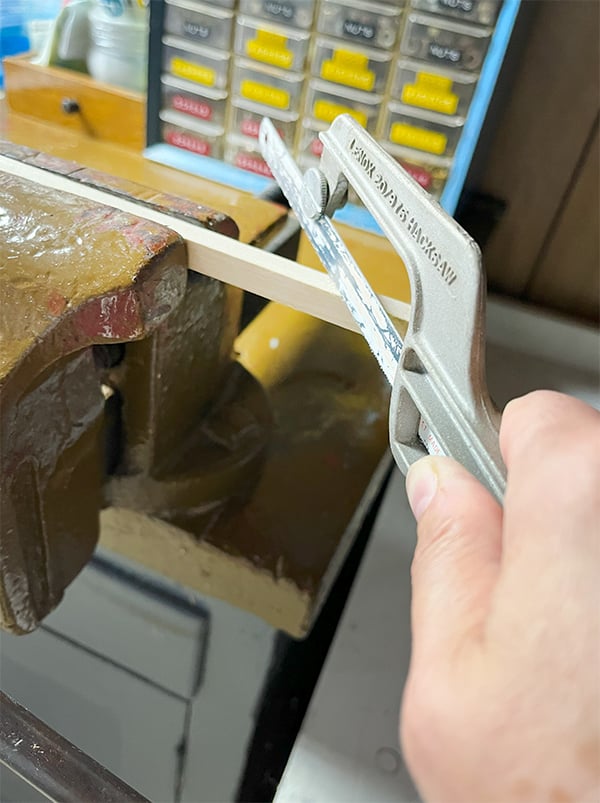
Cut chimney pieces with a hacksaw.
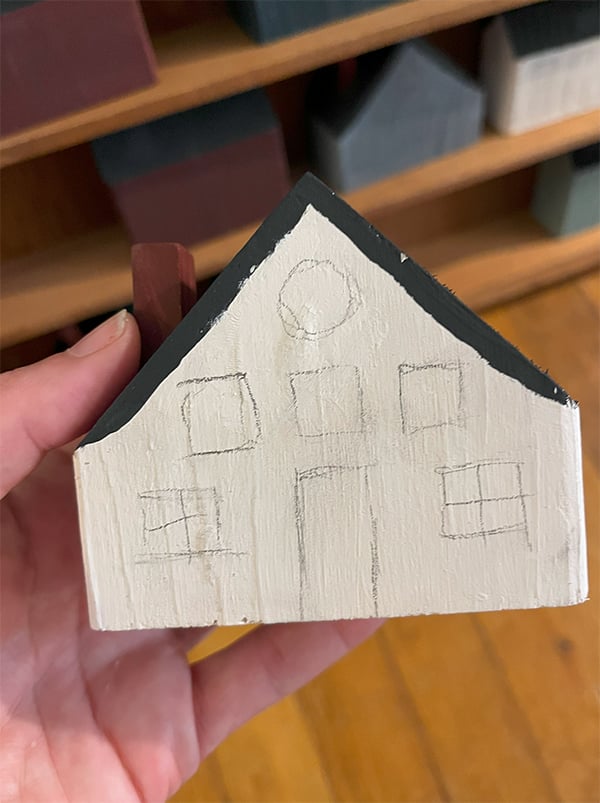
Closeup photo of cutting a square wood dowel at an angle to make a chimney for one of the tiny wooden houses.

STEP 3:

Paint your houses and sketch where the doors and windows will go in pencil.

Holding a white painted tiny wooden house that has pencil marks to rough in the door and window placements.

Paint the doors and windows using a wide brush using long, single strokes.

Photo of painting a stroke of barn red using a wide paintbrush for the door.
Photo of a wooden house painted blue and adding wide paint strokes of a warm white. Shown are the paint colors that make up warm white for a glow in the windows by mixing light mocha and white chalk paint.

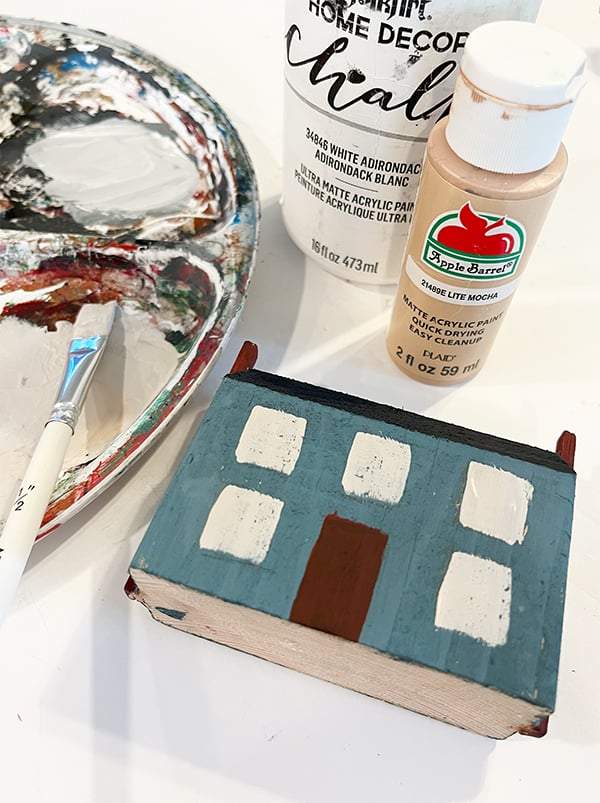
Use a small pointed paintbrush to make lines for the windows.

Photo of a small pointed paintbrush used to make gray line strokes in a cross fashion for windows.

STEP 4:

Paint tacky glue or Mod Podge onto the roof and sprinkle with glitter (optional).

Applying tacky glue to a dark gray painted roof on one of the tiny wooden houses that will sprinkled with fine, white glitter for a snowy look.
Vertical photo of five shelves filled with colorful and finished wooden houses. Between some of the houses is a cluster of miniature bottle brush trees. Pin this image to your Pinterest craft board to come back to this DIY project later!
Star divider used has two hand drawn lines with a star in the center, used as a content break and signals new or different content below. This doodle style illustration is in a medium charcoal gray.

– MORE TO EXPLORE –

Wood Shim Snowflakes + Woodland Felt Animals + No Water Snow Globe

Square feature of a wood snowflake decoration sitting on a chair on top of a basket of birch logs and pinecones with a clear glass vase of willows on the side.
Removing the paper backing from felt pattern pieces after cutting all of them out.
DIY snow globe feature image shows a small snow globe of mini bottle spruce bottle brush trees in a mini bowl dome with a wood slice as a base. Behind this featured globe is one made with a round clear plastic ornament and a wood slice with a 3 inch snowman ornament inside.
Square feature of a wood snowflake decoration sitting on a chair on top of a basket of birch logs and pinecones with a clear glass vase of willows on the side.
Wood Shim Snowflakes
Removing the paper backing from felt pattern pieces after cutting all of them out.
Woodland Felt Animals
DIY snow globe feature image shows a small snow globe of mini bottle spruce bottle brush trees in a mini bowl dome with a wood slice as a base. Behind this featured globe is one made with a round clear plastic ornament and a wood slice with a 3 inch snowman ornament inside.
No Water Snow Globe

Leave a Reply