Repurpose vintage wood yardsticks into adorable ruler box magnets!
These vintage-style magnets make great gifts. They’re also an inexpensive make-to-sell item for your vintage shop, craft fairs, or pop-up shows!
I originally made the two ruler box magnets as air plant holders for my refrigerator.

They came out so cute that I decided to make a few more to sell in my antique booth but this time I added Christmas bits that I had in my craft bin.
I bought the reindeer and miniature bottle brush trees a while back at Target but you can find similar supplies here on Amazon: Mini deer figurines or these cute glitter ones (on Etsy), tiny bottle brush trees, and assorted miniature ornaments.

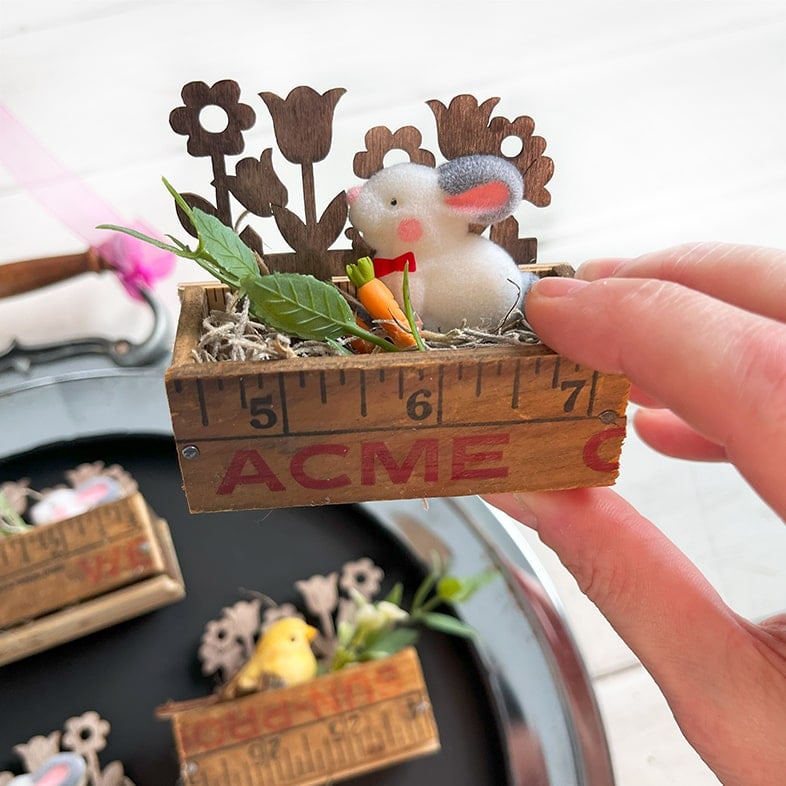
Make them for different seasons! How cute are these spring magnets with bunnies and miniature birds? I found a bag of these adorable flocked miniature bunnies at the antique store and wood fence cutouts at Dollar Tree. If you’d like to make Spring magnets, here are links to similar supplies on Amazon: Miniature wood fence, miniature bunnies, miniature foam birds and clay carrots.

Supplies To Make Ruler Boxes
- Wood rulers or yardsticks
- A miter box and hand saw
- Wood glue
- A small hammer
- Small tack nails (about 1/2″ long, like the ones that come with sawtooth picture frame hangers)
- A sanding block
- GE GE500 Silicone 2+ Window and Door Caulk
- Refrigerator magnets (the ones in the DIY were from Dollar Tree)
How to Make Ruler Box Magnets – 5 Easy Steps
STEP 1: Cut the Wood Ruler Pieces
Use a miter box and a handsaw to cut the wood ruler pieces.
You will need three (3-inch pieces) for the front, back, and bottom of your box. And, two (1.25-inch pieces) for the sides.

Tip: Use pieces from inexpensive wood rulers from the office store for the parts you won’t see like the back or bottom of the box!
++++++++
Learn how to stencil onto canvas to create one of a kind wall art for your home. Read More: Stenciled Canvas Wall Art DIY |
++++++++
STEP 2: Sand
Use a sanding block to sand any rough edges.

STEP 3: Make the boxes
Apply wood glue and tap one tack nail into each side to make a box.

Don’t worry about making these tiny boxes perfect. A couple of mine have extra nail holes from nails that didn’t catch and wood pieces that overhang a little. This is one of those imperfectly, perfect crafts!
STEP 4: Add Magnets
I found that using GE GE500 Silicone 2+ Window and Door Caulk to attach refrigerator magnets to the back of these little boxes gives a lasting hold. Apply a generous amount under and around the sides of the magnet and let dry for 12 hours.

STEP 5: Add Miniatures
Use hot glue to glue miniatures, ornaments, decorations, and greenery to the inside of your ruler box.

++++++++
RELATED cRAFT TO TRY:
Clever ideas to repurpose wine and champagne corks! Read More: 12 Easy Must-Try Wine Cork Crafts |
- Mini Keepsake Tins for Mom & Grandma – Free Printables
- How to Make a Miniature Tiered Tray Ladder
- 10 Vintage Crafts to Make and Sell
- How to Make a Fairy Garden House – Free Template
++++++++
Watch A Video
Link to the full tutorial here –> Wood Snowflake Decoration Made From Wood Shims

++++++++
Advertisement


 Hi, I’m Dawn, a graphic designer, mom and weekend crafter! Join me on my adventures! I always have something new and inspiring going on. Learn more about me


