
This refashioned brooch pin bracelet is a beautiful way to turn vintage or enamel pins into a wearable statement piece. Pins are easy to find at thrift stores, estate sales, flea markets, or even tucked away in your own jewelry box.
These bracelets also make thoughtful bridesmaid or special-occasion gifts and can be customized to match a color palette or personal style. You’ll find the details to make one below.
Refashioned Brooch Pin Bracelet – Video
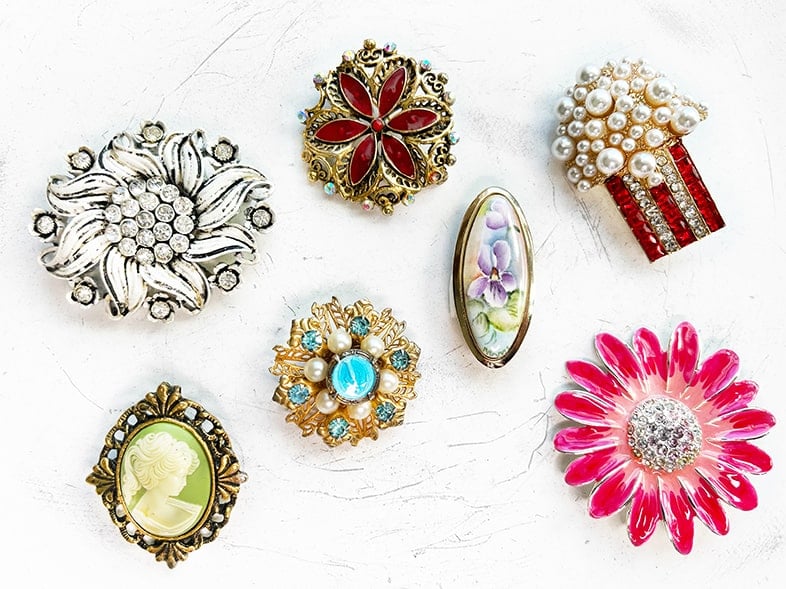
When buying brooches, take note of the orientation of the pin on the back (vertical vs. horizontal) and how it will clasp onto your bracelet.
Below are pins that I picked up at a local antique store, except the popcorn brooch, which I bought on Amazon. If you do head to a thrift store, keep an eye out for beads while you’re there. Sometimes you can find inexpensive strands of vintage pearls or bags of loose beads you can repurpose.
You can also buy pins in bulk or in sets. This beautiful set of Assorted Pearl and Rhinestone Brooches was another Amazon find. Both are great options if you’re planning a wedding and want to make brooch pin bracelets as bridesmaids’ gifts, or make several bracelets to sell at a craft show or pop-up market!

What Beads to Use
You can use any beads you want. I used different-sized strands of pearl beads because neutral ivory works well with a wide range of brooches. Here’s a link to the beads I bought: glass pearl beads in 4mm, 6mm, and 8mm sizes on Amazon.
How To Prevent Your Stretch Bracelet From Breaking
Stretchy bracelets can indeed wear out over time, but there are a few things you can do to extend the life of your bracelets when making and wearing them.
- Use three overhand knots and add a bead of G-S Hypo Cement on the knot. More on that below.
- Size your bracelet so it fits comfortably and stays in place. It should be snug enough not to slip off, but loose enough that it doesn’t overstretch when you slide it on.
- Roll your bracelet gently over your hand and onto your wrist to avoid over-stretching.
- Always remove your stretch bracelets before showering, swimming, or anytime they may come in contact with water.
Supplies

- A brooch pin (check how the pin is oriented–vertical or horizontal before buying)
- Beads (I bought these glass pearl beads in 4mm, 6mm, and 8mm sizes on Amazon)
- Elastic String Stretch Cord for Jewelry (0.5 mm clear)
- G-S Hypo Cement (clear)
- Beading needle
- Scissors
- a sewing measuring tape and rulers
How to Make Refashioned Brooch Pin Bracelet – 6 Easy Steps
STEP 1:
Determine your bracelet size by measuring the diameter of your wrist. My wrist was about 6.5″, but I measured out 7.5″ inches in bead length for a more comfortable fit.

STEP 2:
Put your beads in a row to measure them. I’m making a 7.5-inch bracelet so I measured out the beads against a ruler to get the correct number and make my bracelets all the same size.

STEP 3:
Use your wide beading needle to thread the beads onto your stretchy cord. You can cut the cord from the roll and add a bead bug of clip to the end if you like, just make sure you have enough elastic cord and extra to knot. I kept mine on the roll while beading in this DIY.

STEP 4:
Give your stretch cord a couple of light stretches before tying knots! Then tie with three overhand knots, tighten in different directions by pulling on the cords but do not overstretch. Cut the ends.
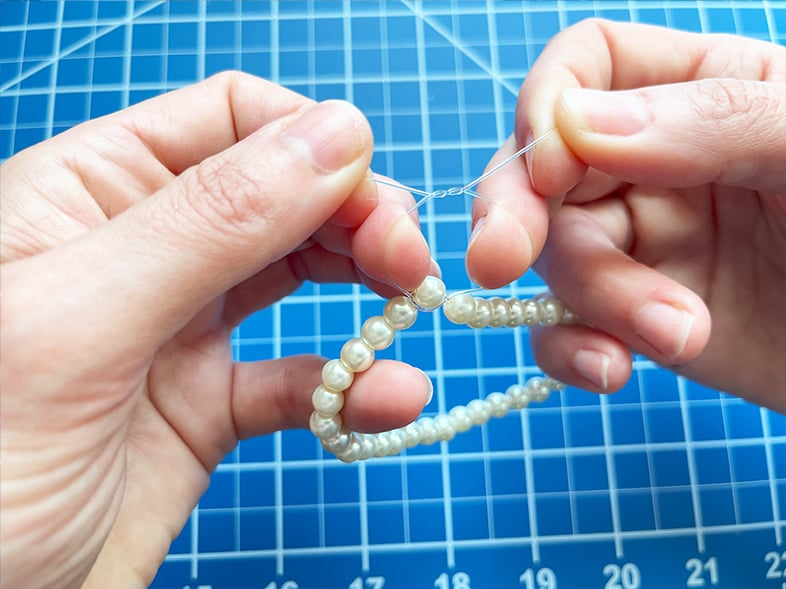
STEP 5:
Add a dot of G-S Hypo Cement to the knot then pull the knot under a nearby bead.

STEP 6:
Repeat and make 4-6 individual bracelets depending on what looks best for the size of your brooch. Unclasp the brooch pin and slip it over all of the individual bracelets. To keep the pin from opening up add a dab of hot glue to the clasp.


 Hi, I’m Dawn, a graphic designer, mom and weekend crafter! Join me on my adventures! I always have something new and inspiring going on. Learn more about me