This easy-sew summer beach tote is roomy enough to hold 4 beach towels with space to spare.
There’s no pattern, just a few easy-to-follow instructions.
The finished size of this tote is 18 inches wide by 15 inches tall with a wide 6-inch base. I used upholstery fabric for the outside of my bag and lightweight cotton fabric for the lining and handles. Below is a step-by-step tutorial and a printable PDF.
Supplies
- fabric and matching thread
- fabric marking pen/pencil
- straight pins
- scissors
- measuring tape/ruler
- iron
- sewing machine
- FREE Download: Easy Sew Summer Beach Tote Pattern and Instructions
How to Make an Easy Sew Summer Beach Tote – 6 Easy Steps
Below are quick steps to get you started, download the PDF with detailed instructions in the Supplies List above or at the end of this post.
STEP 1:
Start by folding your fabric in half (at the bottom) and cut according to the measurements below.


STEP 2:
Sew the sides and bottom of your bag for the body of your bag and the lining. Below shows how to sew the bottom gussets.


STEP 3:
Insert the lining of the bag into the body of the bag as shown below.

Line up the seams then stitch around leaving about 4″ open so you can turn the body of the bag inside out.

STEP 4:
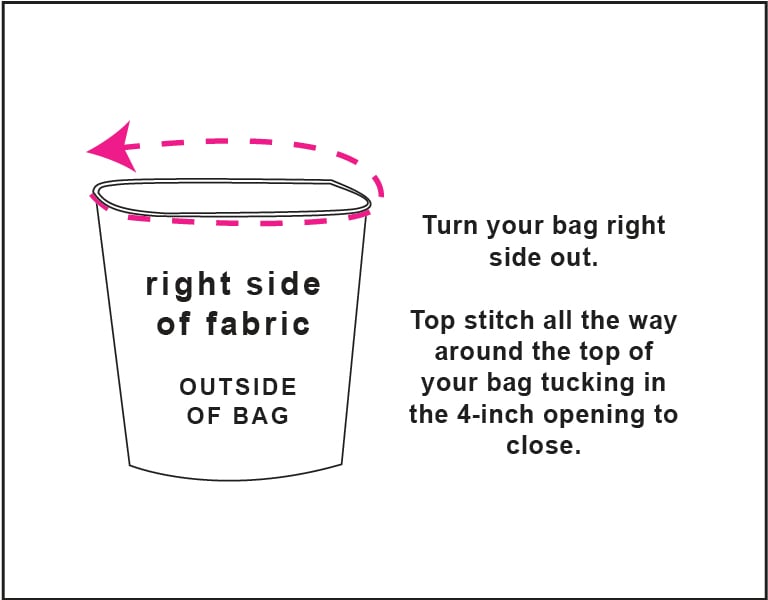
Once you’ve flipped the bag right side out, top stitch around the top edge of your bag to give it a finished look. Tuck in the 4″ opening as you top stitch to close.


++++++++
Summer just got sweeter with these fun pineapple crafts! Read More: 10 Sweet Pineapple Crafts You Have To Try |
++++++++
STEP 5:
To make the handles, fold the fabric for both handles in half lengthwise and press before sewing. Sew across leaving the ends open then turn handles right side out.

STEP 6:
Turn the handle right sides out. Tuck in the ends. Press and pin to your bag as shown in the diagram below.


Pin The Handles: Measure, mark and pin the handles onto the bag 5 inches from the side seams and 1.5 inches from the top as shown below. Stitch a rectangle to secure the handle to the bag and an X across to reinforce the handles.

Download the PDF With Complete Instructions.

++++++++
MORE IDEAS FOR SUMMER:
Make pretty stained glass style earrings. No resin or glass in this easy DIY! Read More: DIY Stained Glass Style Earrings. |
- DIY Americana Scarf Wreath
- Recycled Plastic Bag Friendship Bracelets
- DIY Firecracker Windsocks
- Inspiring Fairy Garden Ideas and Easy DIYs
++++++++
Watch A Video
Link to the full tutorial here –> Farmhouse Mini Pillows for Your Tiered Tray


 Hi, I’m Dawn, a graphic designer, mom and weekend crafter! Join me on my adventures! I always have something new and inspiring going on. Learn more about me


