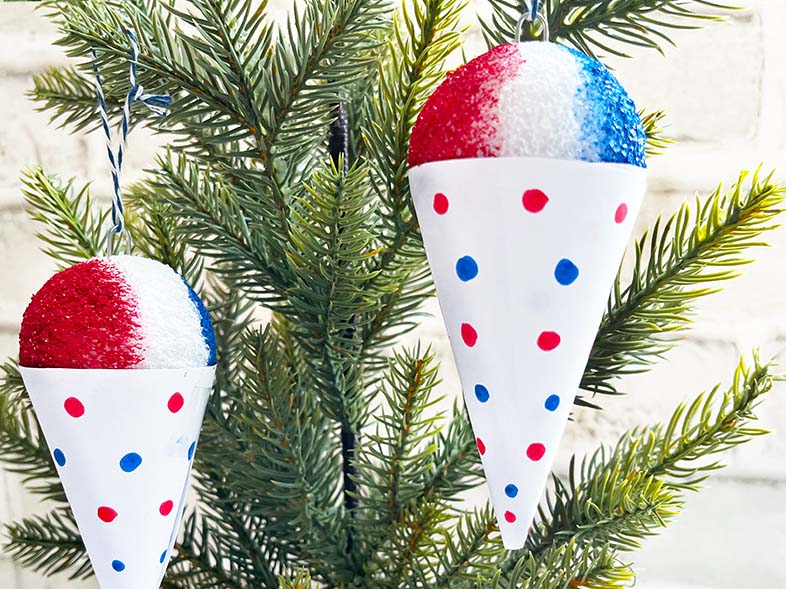
Easy DIY Snow Cone Ornaments

This post may contain affiliate links. Please read our disclosure policy for more information.

Finished DIY snow cones in red, white and blue for the snow top and red and blue dots on a white snowcone cup. String hanging from the top but they are shown in a wicker basket with a palm leaf behind for Christmas and July!

Make festive DIY Snow Cone Ornaments!

These fun ornaments are easy to make and a great craft for kids. You can get most of the supplies from Dollar Tree and some items you may already have in your craft bin.

We decorated ours in red, white, and blue colors but you can make them in any color from lime green to neon orange to rainbow.

Make them in July to celebrate Christmas in July or make a bunch to decorate your holiday tree. Below are the how-to’s and a list of supplies!

DIY Snow Cone Ornaments shown hanging from a small pine tree.

Supplies

  • An 8.5″ x 11″ sheet of paper
  • A bowl or small plate – something to make a circle with (6 to 6.5″ size)
  • Foam balls (2 or 2.5″ size)
  • Scissors
  • Clear scotch tape
  • School glue or tacky craft glue
  • A pencil
  • Markers (optional)
  • Paper clips
  • Acrylic paint and a paintbrush
  • String

++++++++

Related Post

Make adorable Framed Pom Pom Art to brighten a nursery or child’s playroom!

++++++++

How to Make DIY Snow Cone Ornaments – 4 Easy Steps

STEP 1: Trace a Half-circle

Use a small plate and trace a half-circle with a pencil onto a white piece of paper and cut it out. The cereal bowl I used here was about 6 1/2 inches in diameter.

Instructional photo of a half circle made using a plate to make a cone.
Cut a half circle out of paper

STEP 2: paint Foam Balls

Paint foam balls with acrylic paint.

Instructional photo of two painted foam balls to make DIY Snow Cone Ornaments.
Paint foam balls

STEP 3: decorate the paper Cone

Decorate your paper cones with markers. Then form it into a cone and tape it together at the side.

Instructional photo of a paper snow cone made from a half paper circle decorated with blue and red marker dots and taped together to make a cone for the bottom of our ornament.

STEP 4: Assemble

Insert a paperclip into the top of your foam snow cone ball so you can add a string to hang your ornament by. Then use school glue or tacky glue on the inside of your cone to glue the foam ball in place.

Instructional photo with half circles decorated with red and blue dots, tape, paper clips and school glue. All to assemble finished DIY Snow Cone Ornaments.
Push a paperclip into the top to use as a hook and attach a string.
Vertical pinnable image of two finished snow cone ornaments hanging against a light wood background with a palm leaf at the top. Please pin to your Pinterest craft boards to come back to later!

++++++++

Click here to sign up for my weekly newsletter and stay up on the latest!

++++++++

Related Post

Learn how to make a S’more Gingerbread House! 

RELATED CRAFTS IDEAS:

++++++++

Watch A Video

Link to the full tutorial here –> DIY Felt Air Fresheners – Free Templates

Leave a Reply