
A simple Christmas upcycle using a plastic jug and a few basic supplies to create a weighted Santa gnome doorstop. Find the supply list and steps below.

Supplies
- A gallon plastic water (or milk) jug
- Rice or rocks (to add weight)
- White faux fur
- A Dollar Tree fleece scarf or fabric 24″ x 10″ (for the body)
- A Santa hat
- A 1-inch ball ornament, pom pom, or bead (for the nose)
- Poly-Fil stuffing
- A sharp precision knife (X-Aacto knife)
- Scissors
- Hot glue gun
How to Make a Santa Doorstop Gnome – 5 Easy Steps
STEP 1:
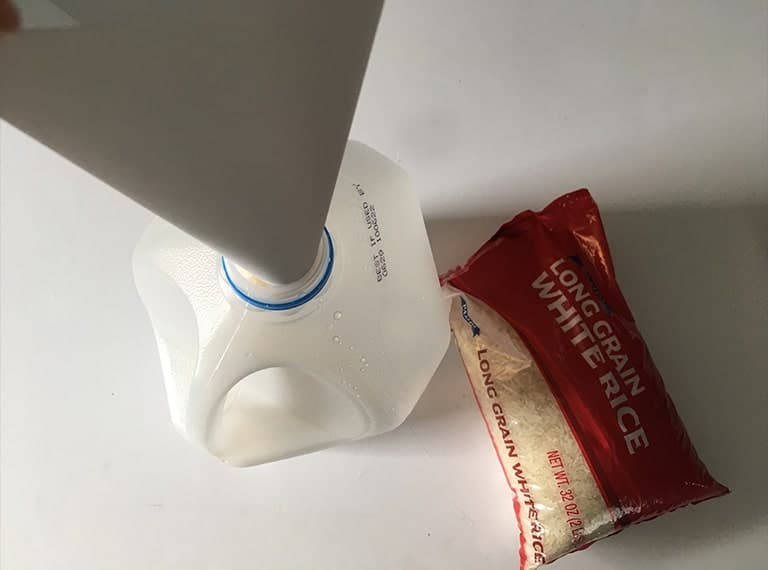
Start by filling a clean jug with rice or small rocks. I used a paper cone as a funnel. Fill it as much or as little as you want, until you get the desired weight, then put the cap back on.
STEP 2:
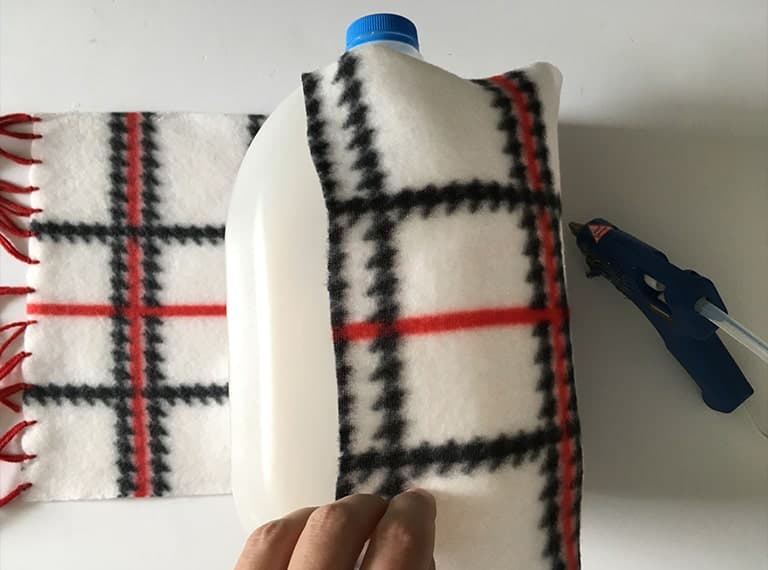
Cut a fleece scarf or fabric to fit around the milk jug, and hot glue it to the jug. I just glued it at the seams.
STEP 3:
Modify a Santa hat by cutting the fur edge off. I did this because I wanted the red part of my hat to stand out against the gnome’s white beard.

Hot glue the raw seam to the inside of the Santa hat for a neat/finished edge.

Fill your Santa hat with a little poly-fil stuffing.

STEP 4:
Cut the faux fur for the gnome’s beard using a sharp precision (X-Acto) knife. Cut a wide triangle on the wrong side of the fabric. Make sure that the fur is flowing downward. My triangle was about 18″ wide and 7″ to the point of the beard.
Note: Do not use scissors to cut the beard, this will cut the fur along the edges needed for a flowing beard look!

STEP 5:
Hot glue the beard to the jug where you want it, then the hat and nose to finish.


 Hi, I’m Dawn, a graphic designer, mom and weekend crafter! Join me on my adventures! I always have something new and inspiring going on. Learn more about me