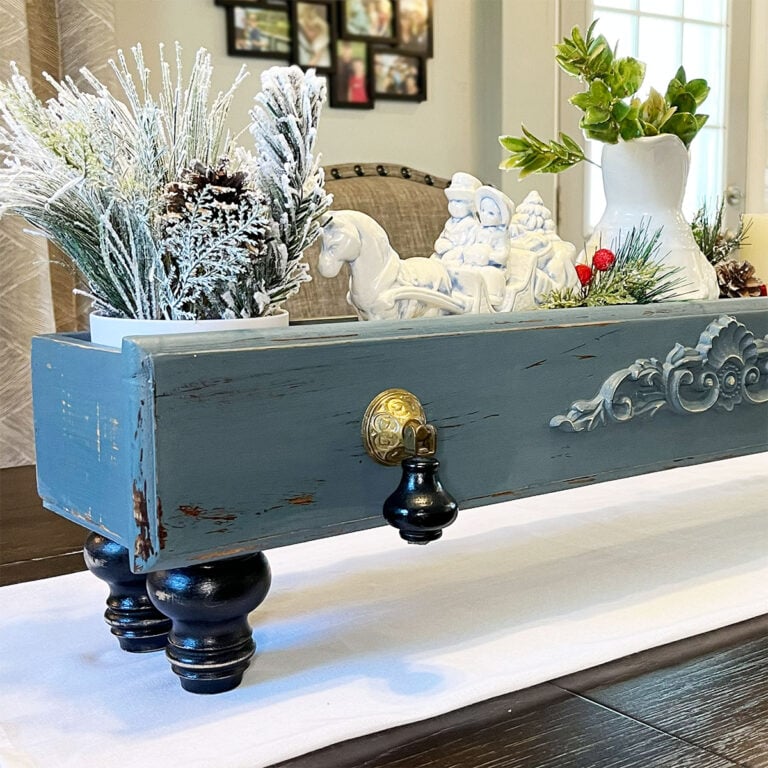
This simple repurpose turns a thrifted drawer into a raised table display. It’s an easy way to add vintage character to a dining table, sideboard, or seasonal centerpiece.

To make this plain drawer a stunning centerpiece, I went on a hunt for vintage drawer pulls to replace those ugly wooden knobs and found these beauties at the antique store.

I also purchased these 3″ tall wood feet and a 12″ decorative wood applique on Amazon for this project.

How to Turn an Old Drawer into a Footed Riser – 5 Easy Steps
STEP 1:
Started by attaching the feet with wood glue and long wood screws.

STEP 2:
Sand and coat with primer if needed. I lightly sanded the drawer front with 320-grit sandpaper and added a coat of Dixie Belle BOSS Paint Primer to prevent color bleed-through from ruining the finish later. This is a good step when covering dark or orange-stained wood surfaces.


STEP 3:
Glue on any embellishments in place. Here, I used wood glue, a heavy iron, and clamps to set my wood applique in place and then let it dry overnight.

STEP 4:
Paint your drawer riser. Here, I used Dixie Belle Mineral Paint in Stormy Seas and Caviar on the feet to match the drawer pulls.

STEP 5:
Last, I scuffed the front lightly with sandpaper for a worn, weathered look, then applied a matte topcoat to protect the piece. You can use any finish you have on hand, such as wax or polyurethane.


 Hi, I’m Dawn, a graphic designer, mom and weekend crafter! Join me on my adventures! I always have something new and inspiring going on. Learn more about me