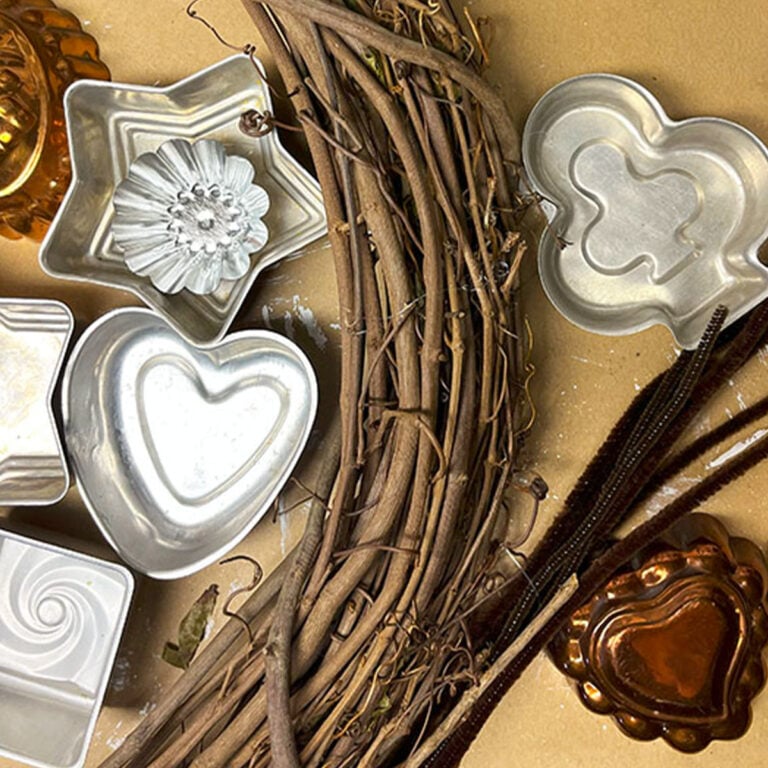
Make a tart tin wreath using your favorite vintage baking tins.
Over time, I’ve collected a variety of vintage tins from antique stores, flea markets, and thrift shops—and they make a beautiful display together. If you have a few of these little gems and want to turn them into a wreath without drilling or damaging them, this easy DIY has you covered.

Supplies
- Approximately 20 tart tins
- An 18-inch grapevine wreath
- 12-inch chenille fuzzy sticks
- Masking tape
- A hot glue gun
- Faux greenery/succulents
- Green dried moss
How to Make a Vintage Tart Tin Wreath – 3 Easy Steps
STEP 1:
Begin by deciding if you want your tin’s face up, face down, or a mix.
Use masking tape to tape the pipe cleaners to your tins. Tape is not permanent, but it will hold and won’t damage most tins. It may leave a sticky residue, but you can clean that up with Goo Gone if you ever decide to reuse them later. I also used hot glue to glue the smaller, round tins to the center of my stars. Again, not permanent, but not damaging either. Photos below…


STEP 2:
Attach the tins to the grapevine wreath by pushing the ends of the fuzzy sticks through the branches and twisting to tie at the back.

STEP 3:
Decorate by hot gluing dried floral picks and preserved moss to finish your wreath.

Looking for more ways to reuse vintage tart tins? Explore these clever repurposed tart tin ideas.


 Hi, I’m Dawn, a graphic designer, mom and weekend crafter! Join me on my adventures! I always have something new and inspiring going on. Learn more about me