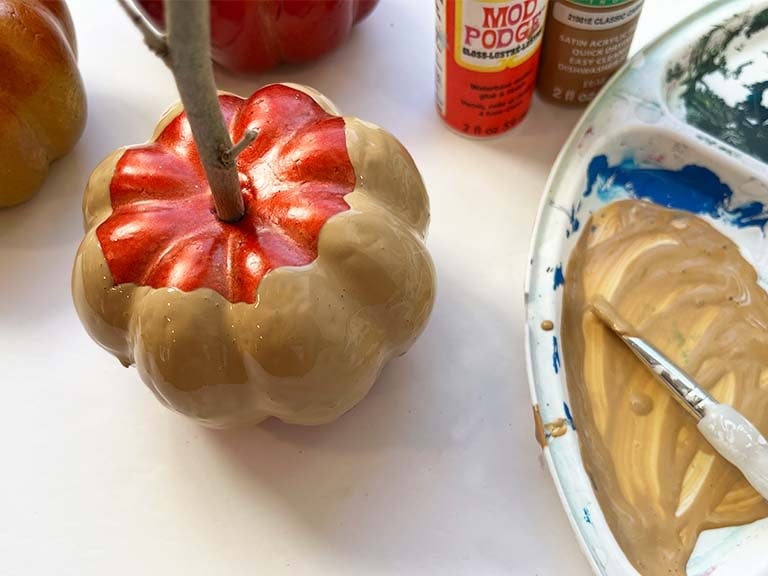
Make these cute decorative caramel ‘pumpkin’ apples to add to your fall decor or tiered tray!
I used Dollar Tree mini foam pumpkins for this DIY. I had a bunch of them and thought they would look cute with caramel and sprinkles.
These pumpkins are about 3 inches wide by 2 inches tall and you can purchase them almost anywhere. I used orange and red pumpkins. Dollar Tree also had green ones which I think would look great here but they were all out when I went back 🙁
I also splurged and bought polymer clay sprinkles on Etsy. They look just like real cupcake sprinkles and come in lots of different shapes and colors!

You Can Also Decorate Your Pumpkins With Faux Nuts
These are generally made from natural corn cob bedding that is used for small animals. Yup, dried and crushed corn cobs look just like chopped nuts. I couldn’t find a bag in stores near me. It would be sold in pet supply stores but you can also buy it here (on Amazon) or pick up a smaller bag sold as faux nuts here on Etsy.
Check out the video above to learn how to make decorative Caramel apple pumpkins and see the full tutorial below.
++++++++
DIY Decorative Caramel ‘Pumpkin’ Apples – Video

++++++++
Supplies

- Small foam pumpkins
- Acrylic paint in light brown or classic caramel
- A paint brush
- Mod Podge in Gloss
- Sticks (or you can use dowels or popsicle sticks)
- Polymer clay sprinkles or faux nuts (optional)
- Paper cupcake liners, ribbon, or other decorations (optional)
How to Make Decorative Caramel ‘Pumpkin’ Apples
STEP 1:
Start by removing the stem from your mini foam pumpkins. Then push a stick into the center of the pumpkin.

STEP 2:
Mix equal parts Gloss Mod Podge and Caramel color acrylic paint. Mod Podge adds thickness and acts as a glue to adhere faux sprinkles or faux chopped nuts.
When mixing, fold the caramel paint slowly into the Mod Podge. I whipped mine together and that caused a lot of bubbles. I couldn’t totally avoid bubbles but slowly mixing the paint into the Mod Podge helped.
Note: Mod Podge dries clear so it will not change the color of your paint.

STEP 3:
Use a paintbrush and apply a generous amount for a thick ‘caramel’ look! Try to use short brush strokes and drizzle a generous amount of paint starting at the top of the pumpkin. Check out the video above for more detail.

++++++++
Awesome Fall decor ideas for your tiered tray! Read More: 15 Fall Tiered Tray Decor Ideas |
++++++++
STEP 4:
Add polymer clay sprinkles to freshly painted pumpkins before the paint sets up. Let your pumpkins dry completely (about 24 hours) before displaying them.


++++++++
Repurpose wood yardsticks into adorable holiday magnets! Read More: DIY Holiday Ruler Box Magnets |
RELATED CRAFT IDEAS:
- How to Make a Wine Cork Tray Using a Stretched Canvas
- Free Pumpkin Spice Art Prints
- Reindeer Bean Bags – Free Pattern
- Hand-Painted Tea Towels DIY – Free SVG Stencil Art
++++++++
Advertisement


 Hi, I’m Dawn, a graphic designer, mom and weekend crafter! Join me on my adventures! I always have something new and inspiring going on. Learn more about me


