Learn how to make scrap wood signs for all the seasons!
These DIY wood block signs are a simple scrap-wood project you can refresh for every season. I first spotted a version of these at a local antique store and loved how easily they could be updated with new words or designs—perfect for decorating or selling.

Seasonal Word Blocks – Video

Supplies
- 2″ x 4″ x 2″ wood board
- Dark stain – I used a dark gel stain in mahogany
- Chalk paint
- Paintbrushes and an old cloth
- Fine-grit sandpaper
- A Chop saw (or miter box and hand saw)
- A T-square (or a ruler) and a pencil
- A cutting machine (I’m using a Cricut Maker)
- A standard grip cutting mat
- Weeding tools
- Adhesive vinyl or Stencil vinyl – to make reverse stencils
- Transfer vinyl
- Download the Free Wood Block Sign SVG Files here.
How to Make Seasonal Word Blocks – 4 Easy Steps
STEP 1:
Lightly sand and sand a long 2 x 4 board with a dark stain on all sides. Here, I used a dark Gel Stain in Mahogany. I love gel stains because you can get a dark, rich color with only one application. I applied one coat of gel stain and let it sit for about 30 seconds before wiping away the excess with a soft cloth.

STEP 2:
Use a cutting machine to cut your stencils. If you’re using the free Wood Block Sign SVG Files (link in the supplies list above). These files are set up to the correct size for 2 x 4 boards. Use stencil vinyl if you like, but I just used leftover vinyl that I had on hand.

STEP 3:
Transfer your stencil to your 2 x 4 using transfer tape and a scraper. The vinyl letters and images will block paint from being applied to those areas. See the video above for more details.


Next, draw a cut line and use a shop saw to cut into individual signs.

STEP 4: Paint and Finish
Paint your signs with a lighter color paint and remove the vinyl stencils. Last, use sandpaper to distress the edges.

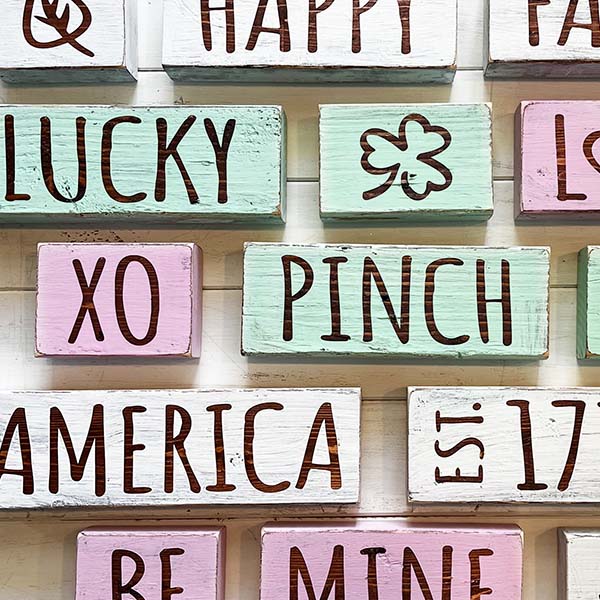
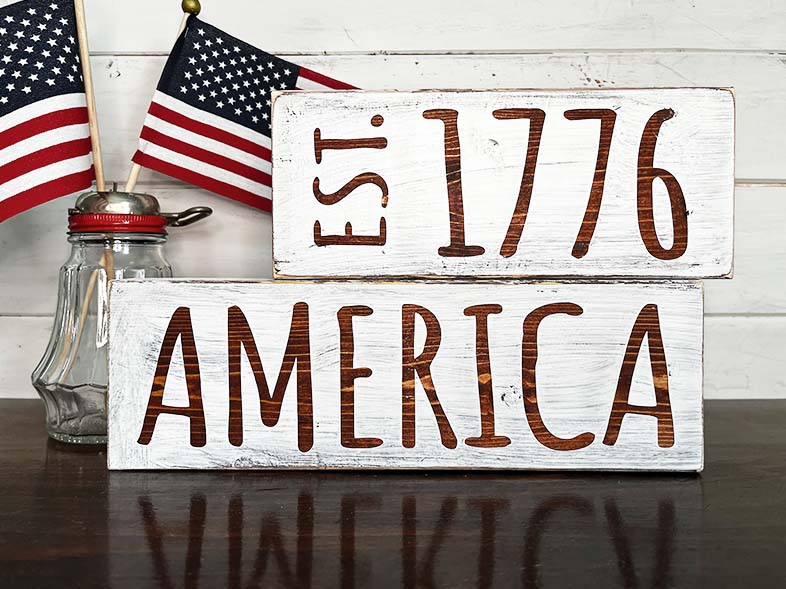
Photos of my finished word block signs.


RELATED IDEAS

 Hi, I’m Dawn, a graphic designer, mom and weekend crafter! Join me on my adventures! I always have something new and inspiring going on. Learn more about me