Make these adorable repurposed tart tin trees to give as gifts, decorate your tiered tray, or use as place-setting holders.
I love these cute trees. The first set I made had Christmas red and green beads on top but I thought I’d make a few more with hearts on top for Valentine’s Day. Below are all the details on how to make them.

Supplies
- Clear E6000 adhesive
- Clear E6000 Jewelry and Bead adhesive (recommended if applying glitter)
- New or vintage tart tins in varied sizes
- Wood spools in two different sizes (link to them here on Amazon….two 1-inch wooden spools, and a 1.125 x 1.75″ spool for the base.
- 2-Part Epoxy (optional read more in step 4 below)
- Glitter, beads, and other decorations you’d like to add (see suggestion below)
++++++++
++++++++
How to Make Repurposed Tart Tin Trees – 4 Easy Steps
STEP 1: Decorate your Tart Tins (optional)
Add decorations to your tins before assembling them, just don’t add the bead to the top just yet, that’s in step 4. If you’re not up for glitter, below are other decorations you could use…
- Dabs on glitter nail polish
- Glue ribbon around the edges of your tins
- Glue colorful beads or sequins to your tins
- Apply small heart-shaped stickers
- Decoupage your tins with Mod Podge and patterned paper napkins
- Paint them with spraypaint, acrylic, or chalk paint
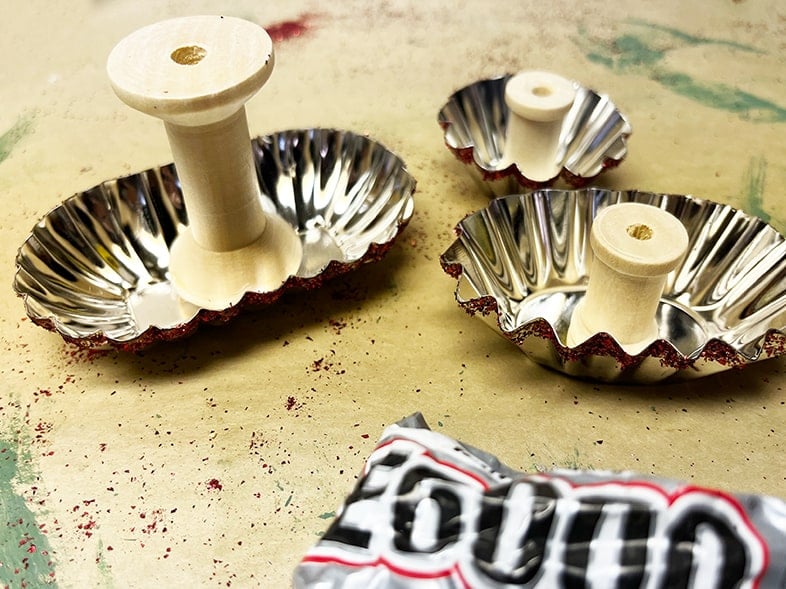
To decorate with glitter, apply E6000 to the edges of your tins. Note: I don’t recommend using hot glue, in my experience, hot glue tends to peel off smooth surfaces.


STEP 2: Glue the Wood Spool to the Tins
Use E6000 to glue the wood spools to your tins. Glue one large spool onto your largest tin and two smaller spools onto the middle and top tin. Let everything dry before moving to the next step.

++++++++
Inspiring ways to use vintage tins in your home! |
++++++++
STEP 3: Glue the Tree Tiers Together
Apply E6000 to the end of each spool to put your tart tin tree together.

STEP 4: Glue a Bead to the Top
E6000 wasn’t working on the heart-shaped beads I chose, so I used Gorilla Glue 2-Part Epoxy and I also added a small metal washer to the base to sit my bead into. This did the trick and that bead isn’t going anywhere!
How to use 2-part epoxy… 2-Part Epoxy is actually very easy to use and it dries clear. Just squeeze the top trigger and epoxy solution will flow from both chambers. Mix the two parts together with a toothpick on a disposable paper plate and use the toothpick to apply the epoxy to the pieces you want to glue together.


Above is a better photo of the red tart tin trees. I found the floral glass beads on Etsy, here’s a link to the seller Funky Pretty Beads, and the pink beads (shown below) are flat-sided gems from Dollar Tree that I glued together.

++++++++
Learn how to make beautiful tiered trays using thrifted items. |
RELATED CRAFT IDEAS:
- How to Distress Dollar Store Books with Chalk Paint
- How to Make Ruler Box Magnets
- Farmhouse Mini Pillows for Your Tiered Tray – Free SVG Stencils
- Wood Snowflake Decoration Made From Wood Shims
++++++++
Watch A Video
Link to the full tutorial here –> DIY Garden Mushrooms Using Thrift Store Glassware


 Hi, I’m Dawn, a graphic designer, mom and weekend crafter! Join me on my adventures! I always have something new and inspiring going on. Learn more about me


